

📖 Progolas 2115 Pergola Installation Guide

Thank you for choosing the Progolas 2115 Type Pergola. Before installation, please carefully read this manual and follow each step. Incorrect installation may cause accidents, and Progolas will not be responsible. Always refer to the motor and wiring guide for details.
⚠️ Important Notes
- Installers must strictly follow this manual to ensure safety.
- Check all parts upon opening the box — confirm quantity & condition.
- If any part is damaged, do not install. Contact Progolas immediately.
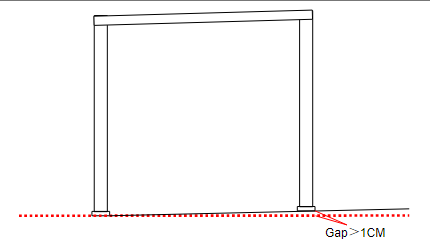
- An uneven ground higher than 1 cm may cause tilt, noise, or motor malfunction.
🛠 Required Tools
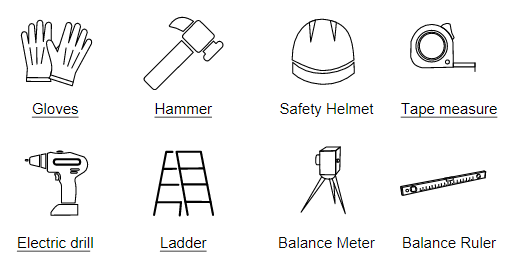
- Gloves
- Hammer
- Safety Helmet
- Tape Measure
- Electric Drill
- Ladder
- Balance Meter
- Balance Ruler
📐 Installation Requirements
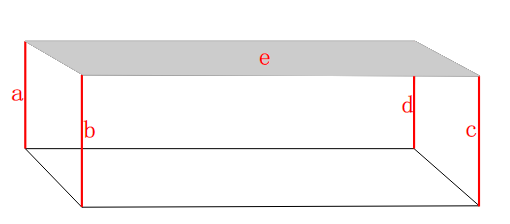
Use a level to check if the site is flat. The ground drop should be ≤ 1 cm. Ensure heights of ABCD are consistent and the E surface is on the same plane.
📹 Installation Video
Watch the installation demo to better understand each step.
🧩 Step 1: Understand & Assemble the Side Beams
After ensuring all tools are complete, wearing a safety helmet, and confirming the construction site meets requirements, let’s first understand what side beams are:
📌 Definition:
The side beam is the primary load-bearing component of the canopy’s perimeter. It supports roof loads (wind, rain, and self-weight), transferring them to the columns or foundation to ensure overall structural stability.
🔧 Side Beam Assembly
Once you understand the role of the side beam, you can begin assembly:
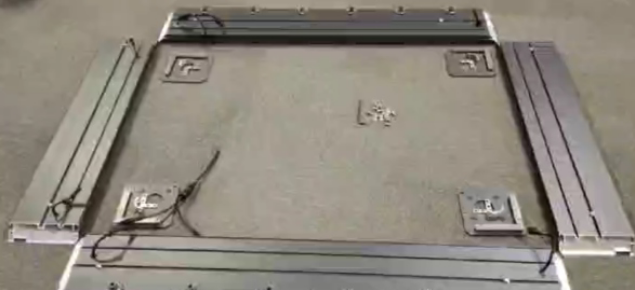
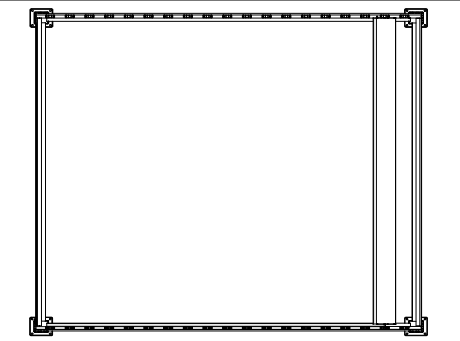
🖼 Illustration: As shown in the figure, first position the side beam and base plate for easy installation.
Note: Pay attention to the distinction between louvers with holes.
🛠 Side Beam Installation Steps

- Remove the base plate from the upright.
- Slide the side beams into the base plate one by one.
- Install the bow-shaped angle brackets.
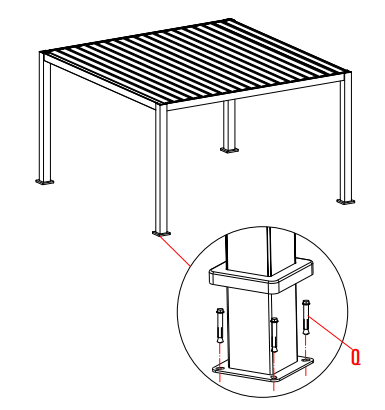
🧩 Step 2: Fixing the Side Beams and Columns
After assembling the main side beams and side beams, the next step is to fix them with the columns to form the foundation of the pergola.
📌 Function of Pergola Columns
The columns are vertical load-bearing components that support the entire pergola structure. Their key functions are:
- Transfer the load from the upper structure to the foundation.
- Ensure overall stability and safety of the pergola.
🔧 Installation Methods
As shown in the figure, follow these steps to secure the side beams to the columns:
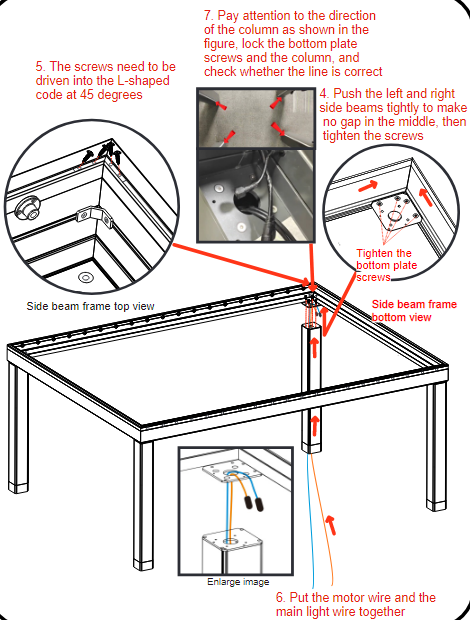
- Push the left and right side beams tightly together to eliminate any gaps, then tighten the screws.
- Drive the screws into the L-shaped brackets at a 45-degree angle.
- Route the motor wires and main light wires properly.
- Ensure columns are oriented correctly, secure the base plate screws to the columns, and verify the wiring is correct.
💧 Step 3: Installing the Drainage Gutter
After securing the four vertical posts and edge beams, the next step is to install the drainage gutter. As the name suggests, the gutter is designed to discharge rainwater during the rainy season.
📌 Installation Steps
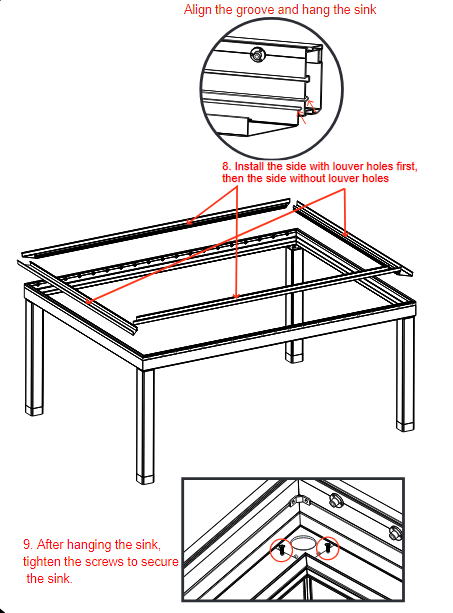
- First install the side with louver holes, then install the side without louver holes.
- Align the grooves and hang the gutter in place.
- After hanging the gutter, tighten the screws to secure it.
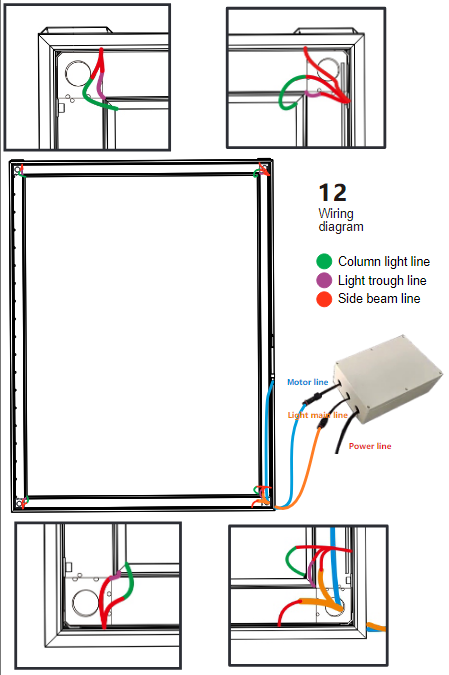
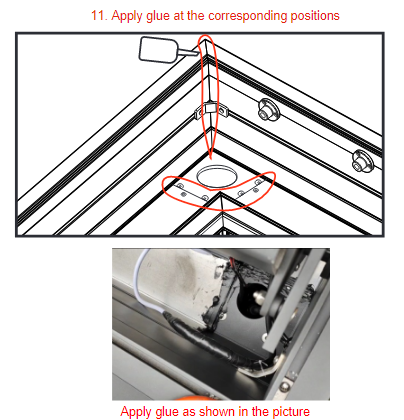
🔌Step 4: Wiring and Gluing
This step connects the electric adjustment function and secures the position of the fixed wiring.
📊 Wiring Diagram:
🧪 Glue Distribution:
🌞 Step 5: Installing Venetian Blind Slats
The Venetian blind slats form the roof of the pergola and are one of its most distinctive features. They allow you to adjust the angle to control shading, ventilation, and lighting — effectively enhancing comfort and privacy. This is also a key difference from traditional pavilions.
📌 Installation Method
▲ Installing the louver blades one by one on the edge beam
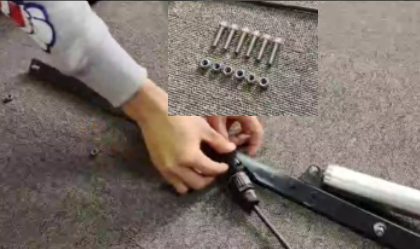
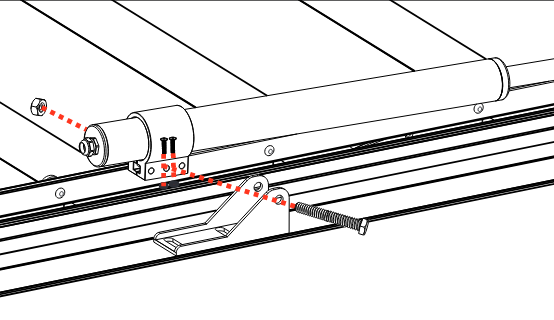
⚙️ Step 6: Installing the Push Rod
The push rod drives and adjusts the opening and closing of the awning or shutter blades. It provides the mechanical transmission required for angle changes or structural movement, complementing the louver blades perfectly.
📌 Preparation
- As shown in the upper-left image: remove the screws from the push rod and set them aside.
- Important: The push rod is installed on the side with the label.
▲ Align the push rod hole with the louver hole, then use the spare screws to secure it.
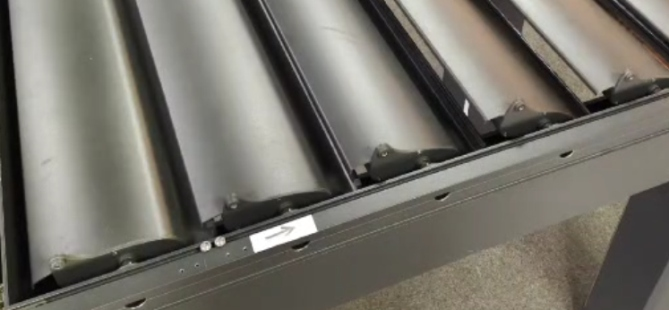
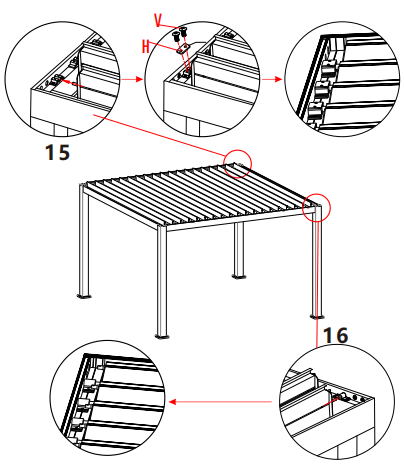
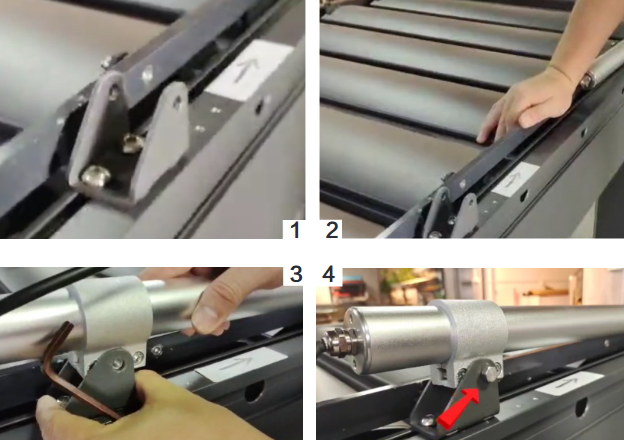
🪛 Step 7: Install and Lock All Blades
Now that the push rod has been installed, the next step is to install and lock all louver blades. This ensures a smooth shading and ventilation function.
🔩 Drive End Installation
- Install the louver blades one by one onto the drive structure inside the side beam.
- Ensure the blades mesh correctly with the drive gears.
- Adjust the push rod connecting rods in both vertical (V) and horizontal (H) directions.
- Check the drive flexibility and verify that the louvers open and close smoothly.
📌 Fixed End Installation
- Insert the other end of the blades into the corresponding fixed slots.
- Make sure each slat is securely installed and neatly aligned.
- Check the overall balance to ensure smooth operation without jamming.
🔌 Step 8: Blade Connection & Wiring
At this stage, connect the power cord, motor cord, and lighting cord according to the wiring diagram. This allows future remote control of both the blinds and the lighting.
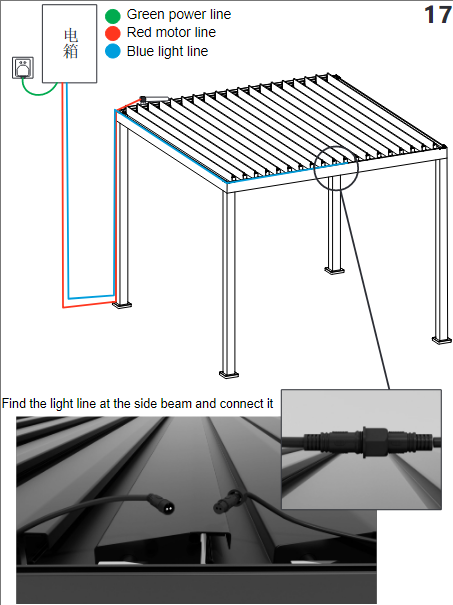
▲ Connect power, motor, and lighting cords as shown
⚙️ Step 9: Install the Motor
The motor is the core component that drives the automatic opening and closing of the louvers. It provides stable power to adjust angles and control movement — ensuring intelligence, convenience, and smooth operation.
🛠 Preparation
📌 Installation Steps
- Lightly lock the accessories on the motor.
- Press the push rod down by hand and check whether the shutters fully close.
- Slide the accessories left and right to align with the motor screw holes.
- Finally, lock the accessories and motor firmly.
🏛 Step 10: Install the Column Cover
The last step is simple — just fix all column covers and tighten the bolts. This gives the pergola a neat and finished look.
⚡ Step 11: Power On & Debug
Turn on the power and run a debug test. Although it’s simple, safety is crucial:
- Check all connections before powering on.
- Ensure proper safety protection while debugging.
🔧 Daily Problems & Maintenance
- If the pergola feels loose, check whether the corresponding screws are tight.
- If abnormal sounds occur, apply lubricating oil to the moving parts.
- Regular maintenance extends the product’s life and keeps it beautiful and safe.
🎉 Summary
Congratulations! You’ve successfully completed the journey of building a 2115 style pergola from “zero to one.”
Though it may seem complicated, it’s really just a matter of following each step carefully — tighten screws, connect wires, install louvers neatly, and finally test. Now, imagine enjoying coffee under your self-installed pergola while feeling a sense of achievement!
– Safety is always the top priority.
– Maintenance ensures longevity.
– For any problems, Progolas Support is always ready to help.
❓ FAQ
✅ Ensure all parts are complete & undamaged. Ground difference ≤ 1 cm.
✅ Install one by one: connect drive end → adjust push rod → fix end → test smooth closure.
✅ Loosen screws, position motor, align with push rod, then lock all accessories.
✅ Tighten screws regularly, lubricate if noisy, and clean to extend service life.
✅ Install louver-hole side first, align slots, hang gutter, tighten screws.
Need Help?
If you encounter any problems during installation, contact Progolas Support — we’re always here to help!